Step 1: Set Up an Eth-Compatible Wallet
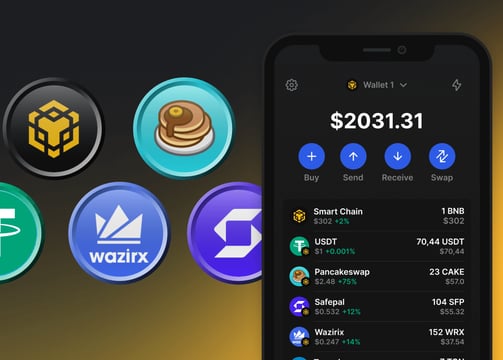
If you don’t have one already, download a crypto wallet that supports Ethereum. We recommend MetaMask (browser extension or mobile app) for its ease of use. After installing MetaMask, make sure it’s connected to the Ethereum Mainnet.
Open MetaMask and go to Settings > Networks to confirm you’re on the Ethereum network.
Now your wallet is ready to interact with Ethereum dApps like Uniswap.
Step 2: Fund Your Wallet with ETH
Ensure you have some Ethereum (ETH) in your wallet. ETH is the currency used for gas fees on Ethereum and will likely be the token you swap to buy $STOCK. You can purchase ETH on exchanges like Binance and withdraw it to your MetaMask wallet (make sure to select the Ethereum (ERC20) network for the withdrawal). Having a sufficient amount of ETH will cover the cost of $STOCK and the small transaction fees.

Step 3: Go to Uniswap and Connect Your Wallet
Navigate to Uniswap (the official site) and click on the “Connect Wallet” button. Choose MetaMask (or your wallet of choice) and authorize the connection. Once connected, Uniswap will be able to view your wallet addresses to facilitate the swap.
Step 4: Import the $STOCK Token Contract
By default, Uniswap might not list $STOCK in its token dropdown, especially if $STOCK is new. You will need the StockX contract address to import the token manually. Copy the official $STOCK contract address. On Uniswap’s Swap page, click “Select a token” and paste the $STOCK contract address into the search box. The StockX token should appear – add/import it. (Double-check that the token that appears is indeed $STOCK with the correct contract address to avoid scams.)
How to Buy $STOCK
Getting your hands on $STOCK is straightforward and takes just a few minutes. $STOCK is traded on Uniswap, a popular decentralized exchange on Ethereum. Follow the step-by-step guide below to buy $STOCK safely:

Step 5: Set Up the Swap (ETH → $STOCK)
Now that $STOCK is added, make sure “From” is set to ETH (or another token you hold) and “To” is set to $STOCK. Enter the amount of ETH you want to swap for $STOCK. The interface will show you an estimate of how many $STOCK tokens you’ll receive.

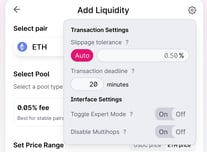
Step 6: Adjust Slippage Tolerance
Because $STOCK has a 5% transaction tax, you need to account for that in the swap settings. Click the settings (gear) icon on Uniswap and set your slippage tolerance to about 5–6%. This slightly higher slippage ensures that the trade will go through even after the 5% tax is deducted from the output. (If you leave slippage at 0.5% or 1%, the transaction will likely fail due to the price change from the tax.) A 5% slippage means the price can move up to 5% during execution — this is usually enough to accommodate the tax. If your transaction still fails, try a slightly higher slippage or split into smaller swaps.

Step 7: Swap and Confirm
Everything set? Click “Swap” and then “Confirm Swap.” Your wallet (MetaMask) will prompt you to confirm the transaction and show the gas fee. Approve the transaction and wait a few moments for it to be mined. You can view the pending transaction in MetaMask or on Etherscan. Once it’s confirmed, you will have successfully purchased $STOCK! Congratulations, you are now part of StockX.
Step 8: Add $STOCK to Your Wallet (View Token Balance)
After the swap, your $STOCK tokens are in your wallet, but MetaMask may not display them by default until you add the token. In MetaMask, click “Import Token” at the bottom of the Assets list. Paste the same $STOCK contract address in the Token Contract Address field. MetaMask should auto-fill the token symbol ($STOCK) and decimals. Add the token, and now your $STOCK balance will be visible in your wallet. (If you ever want to verify your balance without adding the token, you can always see all assets on your address via Etherscan as well.)